The Bone Forest
Ever start something, get jazzed by the idea of it, and then realized you made a horrible, horrible mistake because it is too damn big? For me that is every artistic project I have dove into over the last twenty or thirty years. I can’t seem to help myself.
Take my contribution to Death by Dungeon…
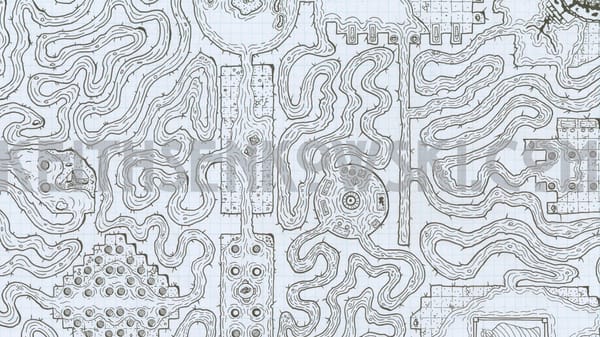
A forest of bone hex crawl in the middle of a complicated dungeon level seems perfectly reasonable… Until you start writing it…
Don’t get me wrong, I love every second of this.
I am experimenting with writing first rather than illustrating, using my words to paint the picture. At the same time, I am avoiding word bloat as much as I can. Keeping the language terse and making every word count.
I think I am succeeding with my first draft of getting close to my goal… I think…
Anyway, the Bone Forest is big, a maze, and has some special procedures to set it up. Here is the first draft of that procedure and the entry hex.
The Bone Forest
When the Apocalypse came, the vast armies of The God covered the world in an effort to prepare for his coming. Things did not go as planned, and they were forced to fight a retreating action all the way to the shores of the Yawning Lake. It was desperate. It was bloody. It was valiant. And it was doomed.
The Last Son of the God foresaw this doom and gave himself and all who fought up as sacrifice to the God. The battlefield fell silent as everyone upon it had their flesh flayed from their bones and all the lands sacred to The God sank into the earth. The Bone Forest was born and it continues to collect sacrifices to expand its footprint.
How to Set Up the Forest
The Bone Forest is a vast territory in which every tree, hill, and structure is constructed of calcified bones. It is cast in a perpetual twilight cast by the God Eye that is partially obscured by the Spires. There are no reliable paths or trails in the Bone Forest, just endless skeleton trees, mounds of skulls, and the occasional structure or hamlet to break the powdery monotony. When the adventurers enter the Bone Forest from the levels above, use the following procedures:
- All of the Bone Forest is considered difficult ground to traverse. Adjust movement accordingly
- The Bone Forest is in a perpetual twilight at all times.
- The only way to navigate through the Bone Forest is by using high ground locations to identify the next place you march.
- When at a location that has a Navigate to entry, the adventures can pick the next location they from that list. This means the location is on high ground, and those locations listed can be seen in the distance.
- If not on high ground and moving to the next location, roll a D12 for the locations in that hex.
- If the adventurers attempt to leave the hex for another without using a Navigate to entry, roll 1D6 to determine which direction they head out from. If there is no hex in that direction, roll the random location chart for the hex they are in.
- Each location within a hex has a description, potential encounters, and suggestions if you want to expand upon them with a mini-adventure of your own.
Random Encounters
Each time the adventurers move from location to location, there is the chance for an random encounter. Use this chart to determine who they meet.
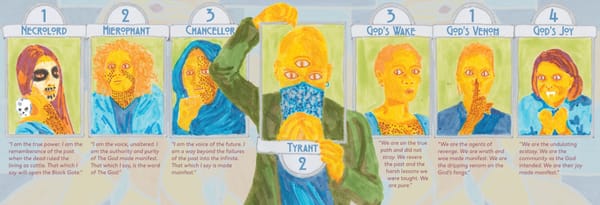
1-3 Dancer’s of God’s Joy
4-5 Blades of God’s Venom
6-7 Mourner’s of God’s Wake
8 A War Engine
9-10 Acolytes of God
11-12 Slaves of the Necrolord
The Bleeding Fields (Hex A)
Here was where the Last Son drew the line in the sand. Here he declared they would retreat no more and fight to the last in service of his father, The God. Here a hundred hundred thousand fell cursing or praising the God. Here they were pushed back, forced to retreat, leaving behind a lake of blood upon which now countless skeletons undulate.
1. The Dirge Gate
Navigate To: The Bloody Stone, The Finger Briar, The Maw
High above the Bleeding Fields looms the Dirge Gate. A massive archway constructed of a myriad skulls of all types of mortals. They endlessly sing funerary songs in unison, filling the air for miles around with their melancholy. In the caves just outside the Gate sits a small camp that each night, through mysterious circumstances, replenishes food, water, and firewood for weary travelers.
2. The Bloody Stone
One of the few natural stones to break the surface of the bones, it sits four feet high. Carved on one side is a sigil from a long dead religion that steadily seeps what seems to be fresh blood that pools on the ground. One wonders what properties this liquid may contain.
3. The Finger Briar
A tangled maze of finger bones sharpened to dagger-like points goes on in all directions. The fingers flex and stretch as they sense movement, looking to mindlessly rend and tear flesh. The bones click and clack in time with the dirges floating in the air from the Dirge Gate.
Mini-Adventure: The Finger Briar is a labyrinth that could have a great treasure at its heart.
4. The Maw
A great gaping hole breaks up the landscape, absorbing the dim light like a whirlpool of darkness. At it’s edge, a tangle of bones shuffles and pulls together, bound together with an unholy will, their noise drowning out the dirge. Within the horned skull a flash of red light kindles malevolent flames in the eye sockets of this War Engine.
Encounter: War Machines (1D8)
Mini-Adventure: The Maw is a deep pit. Who knows what adventure lies within.
5-6. The Red Rune Grove
The bone wrought trees take on a new character suddenly as a corner is turned. Each is marked with deep runes that glow with a soft crimson light. Shadowy figures, wrapped head to toe in linen marked with the same runes flit from tree to tree, watching. Waiting.
Encounter: The Whisper of Truth and Minions (3D6)
7-8. The Weeping Cenotaph
Navigate To: The Silent Skulls, The Red Rune Grove, The Finger Briar
Towering over a mountain of unidentifiable bone shards a great cenotaph made of black obsidian memorializes the first great battle of the end. A carved testament of the events of that clash shimmer into view and disappear as one walks around it’s immense bulk. An endless bead of moisture glistens in the dim light as it is slowly collected by a dark shape at its base.
Encounter: The Broken (1D6+1)
9-10. The Silent Skulls
Navigate To: The Weeping Cenotaph, The Ghost Light Tree, The Watching Grove
A vast field stretches to the horizon, but at its edges stand pillars of skulls, their baleful hollows kindled with candlelight. Crossing their border brings an end to all sound, bringing deafness that defies all magic. Just at the edge of sight great bulking shapes rise up with silent menace.
Encounter: Shambling Champions (3D6)
11. The Watching Grove
Navigate To: The Weeping Cenotaph, The Ghost Light Tree, The Watching Grove
A vast grove of trees constructed from a myriad of different mortal and monster bones fill the horizon. A path of charred bones wind through the macabre sentinels leading to a pedestal of pink stone. Upon it sits what looks to be a well labeled map of the Bone Fields with instructions on how to navigate the maze.
Trap: Anyone who picks up the map will face a geas trap. The geas compels the individual to utilize the map to deliver a jar in which floats two eyes that sits beneath the map in a perfect recess to the House of the Blind Serpent. The map allows its user to pick the locations they wish to march to within each hex as they traverse the Bone Forest.
12. The Ghost Light Tree
In a clearing stands a stark white, ancient tree that has no reason to be within the Bone Fields. It’s bare branches hold no fruit, but lanterns that hang like apples. Each lantern flickers to life with a soft orange glow before going dark after a moment, only to come alight again.
Member discussion